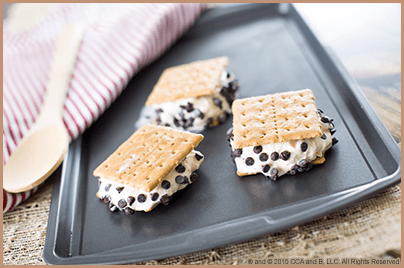
Being the sweets lovers that they are, Santa’s Scout Elves couldn’t wait to share the recipe for this frosty North Pole favorite that easily transforms your family’s favorite gooey treat into a sweet, portable snack! Fans of this favorite cozy campfire treat will love the elves’ warm-weather twist on s’mores that can be enjoyed under the sun!
You’ll Need:
-
★ 2 cups vanilla ice cream
-
★ 1 cup marshmallow creme
-
★ ¼ cup semi-sweet chocolate chips
-
★ 10 graham crackers (unbroken)
Instructions:
Makes approximately 10 frozen s’mores
-
Get your ice cream out of the freezer, allowing it to SOFTEN slightly.
-
Once the ice cream is slightly thawed, transfer 2 cups into a large bowl. Gradually add the marshmallow creme, stirring continuously to SWIRL it together with the ice cream. (Helpful hint: If you prefer, you can complete the mixing in batches. Just keep in mind you should have two parts ice cream to one part marshmallow creme.)
-
ADD the chocolate chips and stir until they are evenly dispersed throughout your marshmallow/ice cream mixture.
-
BREAK a graham cracker in half and spoon the ice cream mixture on to one half. Use the other half to close your s’more sandwich. (Helpful hint: chocolate lovers can also roll the edges of the s’more sandwich in some additional chocolate chips to coat the outside!)
-
Once you’ve assembled your s’mores, PLACE them on a baking sheet, making sure to leave space in between each one. Place them in the freezer for several hours to set. You’re now ready to savor the flavor of your dreamy s’mores dessert in all of its frosty, chocolatey glory!
Santa and the Scout Elves hope you enjoy! Want even more North Pole–approved treats? Browse through some of Mrs. Claus’ other favorite recipes here.
This recipe may contain ingredients that can cause allergic reactions in certain individuals. Before using our recipes, always check the ingredient list and food labels of all ingredients and be sure to seek advice from a qualified physician if needed.

